2.05.2013

Apple-Butternut Hash Brown Casserole (Paleo)

Don't say it. Just don't.

I know what you are thinking, "ANOTHER butternut squash recipe? Already? Really?"

I know, I know. But I have a really good reason for it. 1) I had half a butternut squash I needed to use 2) I prefer to use up what I have in my refrigerator or pantry before picking up more ingredients (not that it always works this way, mind you) and 3) What I wanted to make originally, I either didn't have defrosted or I didn't have on hand.

And you know what? I'm SOOOO glad I made this instead! It is seriously delicious. I am a little worried though because what I originally wanted to make might become the new favorite and I think this dish is kind of hard to beat. I don't want to cheat on my newfound hash brown friend and all.

Once again my recipe is a combination of two recipes. Apple and Butternut Squash Hash and Mexican Hash Egg Bake; with a tweak. Always have to have a tweak.

Apple-Butternut Hash Browns Casserole
(Made 05 Feb 13)

What you need:
1/2 a Butternut Squash (de-seeded, peeled and grated)
1 1/2 Apple (I used granny smith, grated; keep the extra half and slice it)
2 Cloves Garlic (minced)
1/2 Yellow Onion (I had mine finely chopped, but again I'm weird about eating onions)
3 slices of Bacon (cut into small pieces)
2 Breakfast Sausage links
Salt and Pepper (to taste)
One Egg per Person (I used five in this recipe, but seeing as it was lunch time, I was only cooking for the kids and myself)

First, I prepped the butternut squash and apples. I suppose I COULD have used the Cuisinart, but I just had to be difficult and used the cheese grater instead (honestly, it was really easy).

Before

And I'm awesome and didn't take a picture of my grated squash and apples. Sorry.

Then take your garlic and onion and dice them up, mince them, however you prefer these two in your food.

Before

Clearly I was on a roll of NOT taking pictures.

Get everything situated comfortably on your cutting board, give each ingredient it's own bowl. (Just remember, the more dishes you use, the more washing awaits you.)


(Just pretend I have a BEAUTIFUL picture of my fruit and veggie cutting board with everything in its place. I wanted a picture to show the ratio of squash to apple. FAIL.)


My family has a cutting board for fruit and veggies and one for meat. We do not eat a lot of bread, and if we HAVE to cut cheese (hehe.. sorry I'll stop being childish now), we use the fruit and veggie board.

So I took out the meat board and diced up my three slices of bacon.


My sausage was still defrosting at this point, but this is where (if your sausage is ready) you can squeeze out your breakfast sausage from the casings and set them aside as well. Or you can do this while your bacon is cooking. And if you aren't using sausage in a casing, then that is one less step for you to follow/complete!

I used what I had in my freezer. May or may not be paleo; it's Jenny-O. Chicken Sweet Italian Sausage. 

With all the ingredients prepped, it's time to COOK!

First, cook up your bacon. Cook it to whatever consistency you prefer. I LOVE crispy bacon with a little softness. SOMEHOW I managed to cook mine PERFECTLY this time. When your bacon pieces are done, take them out and set them on a plate or a bowl. LEAVE the bacon fat in your pan. I chose NOT to set my bacon on a paper towel (even though I prepped to do so initially) because I wanted to make sure if there were any extra drippings, they went back into the pan when the time came. In case the squash and apples needed it, of course. :)


Isn't it pretty? I just love bacon. And I ONLY took one or two (MAYBE three) pieces. Honest.

Now it's time to throw in your onions. I wanted mine close to caramelization, so I intentionally left out the minced garlic. I'm notorious for burning garlic whenever I throw it in a pan/pot/skillet on the oven. Since onions take a bit of time to caramelize, I left out the garlic to avoid any burning.


When your onions are where you want them, throw in the garlic. You might as well add the sausage at this point too. I think this allows the sausage to absorb some of the onion and garlic flavor, while cooking harmoniously together.


When your sausage is about halfway cooked; add the butternut squash and apple gratings.

Doesn't it look PRETTY?!

Sprinkle on some salt and pepper (I used about 1/2 teaspoon each at this point). Stir everything around so it blends. Then cover it and let it sit. I let it sit between 4-5 minutes and then used a pancake flipper to flip sections of the hash, cover it again and let it sit for another 4-5 minutes.

Now, taste it! If you don't melt right there in front of your range, it' not ready. I seriously just about melted with my first bite. But maybe I'm just (a little) weird.

If your hash browns are ready, it's time to take them over the top. Again.

Crack your eggs right on top of your hash. Go ahead. Believe me, it's worth it.


Now let them sit. I even covered my skillet (with a baking sheet because I do not have a cover for this particular skillet) to help the cooking process along.


See? Depending on how gooey you want your casserole, either keep putting the lid on to help them cook faster, or take your skillet off the burner. I learned you can touch your egg yolk to help determine how gooey (or not) your eggs will be. I left mine on a little longer and sprinkled some more pepper and salt on top. And finally, it was all done.


Talk about DELICIOUS! Arrange some plates, add some apple slices and clementines on the side and VIOLA. It is time to EAT! DEVOUR! I mean, ahem, enjoy this delicious meal.

Momma's Plate.


Kids' Plates. Their eggs were over medium.
Now, listen. This step is VERY important. Take your fork and mix your egg into your hash browns. I'm telling you, absolutely PERFECT.

Perfection.
I do NOT need to eat Cracker Barrel's Hashbrown Casserole with an egg over easy on top. This Apple-Butternut Hash Brown Casserole fits the bill perfectly.

And to keep it real, a picture of the dishes I used and had to clean after eating.


I do NOT have anyone to clean my dishes for me. Although in reality, there aren't nearly as many dishes as one might think! And for the pure bliss of this dish, I'd wash them all over again! Of course you aren't seeing the five plates and forks and drink cups from lunch, but really, it was ALL worth it!

2.04.2013

Bulgogi. And it's Paleo.

Thanks to my wonderfully patient husband, I have FINALLY (okay years ago, but not as many years ago as I would like :) discovered Korean Food. Can I get a "Yum! Yum!"

I pretty much avoided Korean food because kimchi is NOT on my list of foods I enjoy eating. I really DO NOT like pickled food. I remember going out with friends one afternoon/early evening for Korean and the food was good, but I couldn't stomach the kimchi. So my picky little brain avoided all Korean foods. Then I met a boy. And EVERYTHING changed. I mean, you kind of HAVE to try out new foods when the person you are head over heels with has completely different taste in food than you, right? 


(If not, don't tell me, I LIKE the fact that my husband has expanded my horizons.)


Tonight, I made Beef Bulgogi. A friend of mine had a picture up of the bulgogi her brother made and I instantly started craving Korean. More than anything, as soon as I saw the picture, I wished I was back in Sierra Vista so I could grab some Da Bok. (This AWESOME little hole-in-the-wall Korean restaurant (although I think EVERYTHING in SV is "little") that my family LOVED. And by family, I mean my husband and I. The little monkeys were "particular".) So, naturally, I decided to make some Beef Bulgogi and why not go for paleo while I was at it?!


I did a general internet search for paleo bulgogi and came up with three recipes I thought looked stellar. Now, Bulgogi isn't exactly a "pretty" dish, so don't judge these recipes (including mine) by the pictures!


[Note: This recipe requires at least 15 minutes of marinade time for your beef. Luckily I realized this around 1:30p.m., had everything said and done by 2p.m., so my beef marinaded for a minimum of three hours.]


Beef Bulgogi w/Cabbage (Paleo)

(First made 04 Feb 13)

What you need:
1.5-2 lbs beef (I used Tri Tip, but you can use any kind of beef; I saw flank recommended, although I use flank steak for carne asada exclusively)

For the marinade:

1/4 C Braggs Amino Acids
1/4 C Coconut Aminos
3-4 garlic cloves minced
2 Tbsp Sesame Oil
1/4 tsp red pepper flakes
1/4 tsp ginger (I did not have fresh ginger; I used ground ginger, probably closer to 1/8 tsp)
3 green onions chopped
1/4 small white onion
sprinkling of black pepper

Half a Head of Cabbage

1/2 white onion

I've never had to thinly slice beef before, so I followed the recommendation of freezing the beef for 15 minutes (the time it took to gather and prep my marinade ingredients and put them together). If you have awesome slicing-beef-thin skills, then ignore putting your beef in the refrigerator. I left mine in its wrap, sitting in the plastic bag on our meat cutting board, chilling (haha, literally... sorry) in the freezer while I put together the marinade.


Marinade Ingredients
The marinade is pretty simple to whisk together. Chop up the green onions and 1/4 small onion (I like really small pieces and just happened to have half a small onion sitting in my refrigerator) and mince your garlic. After you've prepped the onions and garlic, add all the ingredients for the marinade together. 

It probably will look something like this:

Marinade

Now pull out your pretty chunk of beef from the freezer and get it undressed. Like this:


My beautiful 1.85 lbs tri tip.

 As I mentioned earlier, tonight was my first time thinly slicing up beef. Sadly, I don't have natural skills and had to butcher my pretty tri tip a bit.


I DID however, end up with some pretty awesome slices.


When it was all said and done, I had a WONDERFUL meat fest just waiting to marinate.


Add your slices to your marinade. You can mix it around with your hands or a spoon. Most recipes at this point tell you to put your bowl in the refrigerator and let your meat marinate. I know it isn't exactly "environmentally friendly", but I put my meat and marinade into a bag. Here's why:


I want my meat to suck up ALL the marinade, not just the pieces on the bottom. (And this is a decent size bowl I'm using here too.) So, into a gallon size, plastic storage bag it all goes.


Do you SEE that?! There is liquid ALL the way around each slice of meat and because my beef has three hours before I'll START making supper, the beef is going to truly have time to marinate and absorb the deliciousness of the marinade. Put your beef into the refrigerator and let it be.

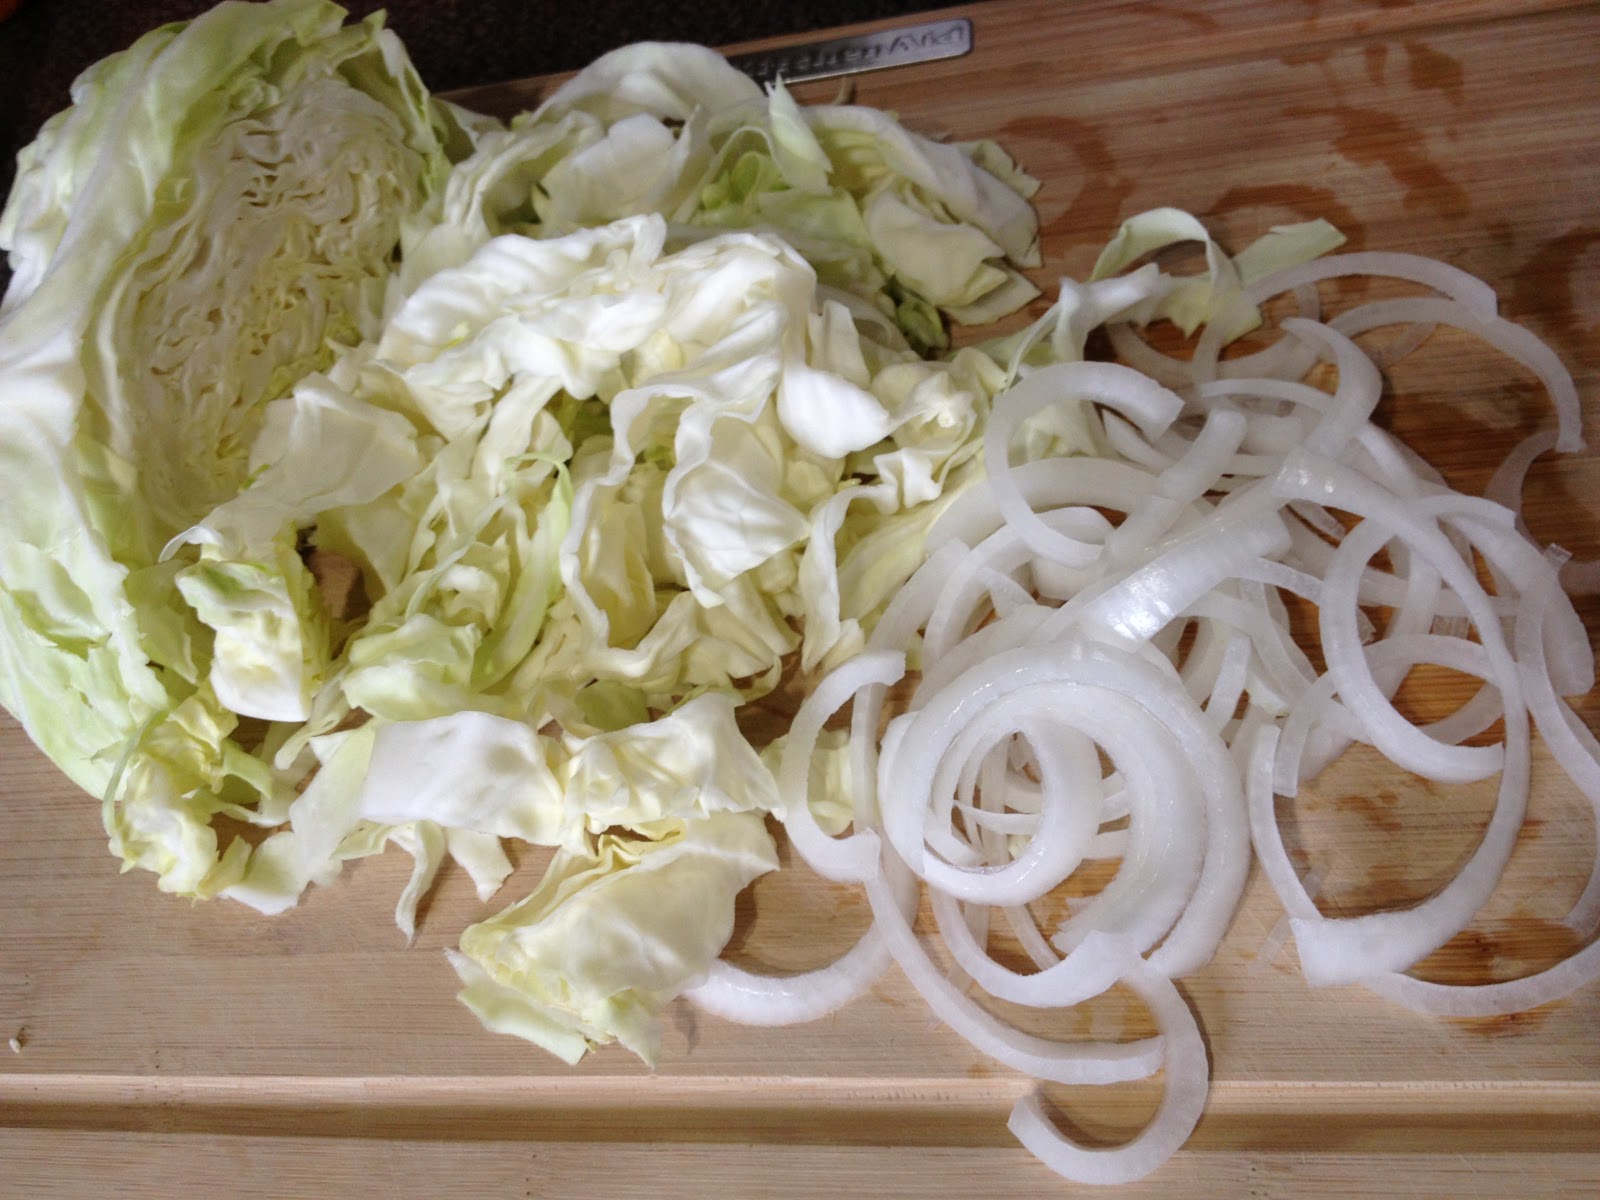
When you are ready to start cooking, pull out your cabbage and half an onion.


Then slice it all up.


For the kiddos, I cooked some rice because I knew they'd be a little iffy on the cabbage and onions. If I'd chosen to be SMART tonight, I would have had them each have a little bite, but being completely smart slipped my mind and I decided to just be gracious to them instead. I kept my onion slices small as I'm not a HUGE onion fan.

Take some oil and heat it up in a skillet. I tossed in the onion slices with the intention of caramelizing them. While the onions were cooking, I pulled out my marinated beef.


Do you SEE how beautiful that is?! Talk about getting me ALL excited to cook it up and start chowing down!

If you have a LARGE (and I am talking LARGE) skillet, I'm pretty jealous, I want one. Could I borrow yours? If you're like me and have tiny, small, and medium sizes to choose from, you'll need to cook the beef in batches. I added about a Tablespoon of coconut oil to my skillet and in batches cooked the beef. I let it cook for a few minutes before turning it over to cook the other side. I'd pull one entire batch out before starting the next batch.

And in the middle of my beef batches, I added the cabbage to the skillet with the onions. Depending on HOW you want your cabbage depends on the cooking time. I decided 5-10 minutes was probably sufficient time to keep my cabbage a little crunchy and away from complete soft, sloppiness. But I'm particular when it comes to my vegetables.

Once I finished my beef batches, I poured the remaining marinade and oil onto the cabbage and onions. Stirred it all together and crammed as much beef into my mouth as I could while the cabbage and onions finished cooking. I also did you the favor of NOT taking a picture of my mouthful of bulgogi.

As SOON as the vegetables were done, it was time to assemble.


Because bulgogi isn't a "pretty" dish, I added some extra greens from a green onion and sprinkled on some sesame seeds. (I could have added sliced carrots too, now that I think about it and that would have livened up the dish.)

If you want to cut on cooking time, you don't HAVE to cook the cabbage. I put some uncooked cabbage leaves on the plate to make two cabbage wraps.


Let me just say...


I DEVOURED my beef bulgogi and cabbage AND my cabbage wraps.

And my fork should TOTALLY be face down to indicate I'm done eating, so the server can clear my place. Oh right, NOT at a restaurant, and since the kiddos were STILL eating their rice and bulgogi in the five minutes it took to stuff my face, I guess I'll clear my own place setting.

2.02.2013

Apple-Butternut-Blueberry Crepes

That title is a mouthful. It also may have some of you scratching your heads, thinking, "Ooh-kaay. Butternut SQUASH?" 

Yes, butternut squash. With apples. And blueberries. How about some cinnamon and maple syrup to go with it? Thinking about it now, I bet some pecans would have gone splendidly with it too. Yum!

I'd been mulling this recipe around in my head for a while. (That's right, I MADE up this recipe. Sort of. With help. You'll see.) A friend of mine introduced me to the paleo lifestyle and one of her first recipes she tried was Cinnamon Maple Butternut Squash. Honestly, I was intrigued. I had NEVER tired butternut squash (in fact, prior to trying some paleo meals I avoided squash like the plague), but how could it possibly taste bad with cinnamon AND maple syrup? Right?

I told her multiple times, it sounded like a dessert or something you'd put in a crepe, but that I hadn't gotten around to trying it yet. Not having tasted butternut squash before, I wasn't sure I wanted to waste crepes, let alone paleo crepes on a dish that may or may not turn out. Especially because paleo flours are NOT cheap and I haven't yet found them in a large enough size where one meal won't wipe out close to half the bag.

Seeing as my family isn't 100% following a paleo lifestyle AND I only needed to cook dinner for the kids and I (my husband says he is against squash with the exception of pumpkin, so if I could make it paletable for the kids and I, maybe he'd try it the next time I make it), I figured we'd go for Real Food Crepes to try out the Cinnamon Maple Butternut Squash crepes. The "problem" still nagging at me though was, "The kids are NOT going to eat this. They're going to be expecting apple crepes as usual." So, I did some research.

What does butternut squash TASTE like? Maybe if it was "buttery" enough or I put in enough maple syrup, I could get away without having to do apple crepes too. I called my Mom. 

"Mom, do you know what butternut squash tastes like? Do you think if I added the apples I usually make with crepes, I could get away with adding the squash too?"

What to do, what to do.

I finally decided to just do it already! 


Apple-Butternut-Blueberry Crepes
(First made 01 Feb 13)

What you need:

For the Crepes:
1 C Whole Wheat White Flour (this is a Real Food ingredient)
2 C Whole Milk (again Real Food, although I consider myself a lactopaleo when I eat paleo)
3 Whole Eggs (I use brown as I do not have my own chickens or a farmer I buy directly from)
Pinch of salt
(I don't add the sugar as I'm going to be using vanilla, maple syrup, cinnamon and end up making a caramel sauce to go with this; I want to cut out as much sugar as possible.)

Put all the ingredients together (in a blender or in a bowl) and mix them together. Put them in the refrigerator for at least 30 minutes. I think I put mine in an hour ahead of time, prepped everything for the filling and once the filling was ready to go and the caramel sauce, I made the crepes. (You could probably do the opposite first, but be wary of how long you leave the crepes in a warm oven, they could harden instead of staying flimsy and soft.)

To make the crepes, first you have to understand it takes practice; unless you are just naturally good at making round crepes. And if you are good at making crepes, you need to come to my house and teach me! Mine DO NOT turn out nice and round all the time. This go around then were more oval shaped with little arms sticking out from time to time. The most important part though: that you can fill them with yumminess and roll them. Or leave them open and eat them that way too!

I used a spray coconut oil to coat the pan. This is the ONLY TIME I spray my pan. Let the pan warm up; try to pour your batter BEFORE the coconut oil turns brown. Brown oil means it is really hot and it can make for a frustrating time trying to make crepes (the batter cooks super fast). In fact, I had brown coconut oil last night and it made for a frustrating crepe-making time, BUT they were still tasty! :) I try to pour my batter into the middle of the pan and let the batter smooth itself out. USUALLY I can get pretty round crepes this way. Last night, was NOT one of those times. Until my last three crepes.

Let the batter bubble up and flip it. Let it sit for no more than a minute and put it on a plate sitting in the oven (oven at warm or you may end with a broken plate). Empty out the rest of your batter until you have a plateful of crepes.


I REALLY should have taken a picture of the back side of these (they were brown) and the ones on the bottom; they were NOT all this "pretty"; this is one of the last ones I made.


Or just click on the word "crepes" above the ingredient list and follow their directions. :)


For the Filling:
(I used a combination of recipes for the filling. Cinnamon Maple Butternut Squash and a general search on apples as crepe filling.)
2 Tbsp Coconut Oil - use more if needed; depends on how much you are making
Butternut Squash - I only used a half and used the "neck" part - I also do NOT know how to pick out a squash and the squash I used had been sitting on the island for at least a week. I have NO IDEA if this attributed to the flavor or not
Apples (I used probably two) - I did NOT peel mine, I like the extra nutrients
1/2 C Maple Syrup - I used real maple syrup to keep with pale
Ground Cinnamon
Salt
1 C Blueberries

(You want an even ratio of apples to butternut squash to blueberries and back, so alter the recipe as need be.)

I took off the skin of the butternut squash as my research showed that some people like it cooked with the squash and some think it's too bitter. Seeing as this was my FIRST TIME EVER cooking, let alone EATING, butternut squash, I decided to take the skin off. The smell from peeling the skin reminded me of cutting open a watermelon. (If I peel a butternut squash when making this recipe again and it doesn't smell that way, I'm going to be a little scared of how it's going to turn out.) Cubed it into small cubes (I wanted it to match the apple pieces. You can peel and core your apple if you want to, but I like to keep the peel on from time to time (one less step and one less item to clean up afterwards). 

I used a large pot to cook the apples and a skillet for the butternut squash. I added one to two tablespoons of coconut oil to each, melted it and then added the respective filling. The recipe for the squash mentioned 10-15 minutes for the squash to be soft and 10  minutes is about needed to soften the apples. I cooked both until they were fork tender (I could stick a fork in them). You will need to stir the apples to keep them from burning and you will need to turn the squash to make sure it gets brown on all side and to help cook the pieces through. 

After the 10-15 minutes, I decided I was going to mix the two together, so I added the butternut squash to the apple pot (hence the reason I used a pot; I wasn't 100% sure WHAT I was going to do). I added a 1/4 cup of pure maple syrup, a sprinkling of cinnamon (I KNOW how slow my cinnamon sprinkles out, so I just squeezed the container once, probably about 1-2 tsp; enough to "coat" the butternut squash AND the apples if they were cooking separately), and a pinch of salt to offset "too much sweetness".

Then I started the Easy Caramel Sauce. As I started the caramel sauce, I kept looking at the pot of apple butternut squash mix and decided that blueberries would really add SOMETHING to the mix. So I took out a package of frozen blueberries and added just a bit (maybe 4 oz). Turned the heat back on and mixed them around, just long enough to help defrost the berries a bit and to turn the filling mixture purple. 

And I added a pad of butter. Just a tablespoon or so. Mix it all around until it melted.

The filling ready to be put into or onto a crepe!


(I honestly wasn't sure HOW these crepes were going to turn out and I figured if anything would save a mess, it'd be this easy caramel sauce. NOT paleo and NOT Real Food, but absolutely DELICIOUS. And because I skipped the sugar in the crepes, I wasn't going to feel bad about having a drizzle over my Apple-Butternut-Blueberry Crepes!)

I made HALF the recipe, since I had high hopes of making this mesh up of food work!

2 Tbsp butter
1/2 C brown sugar (I make my own and again with trying to reduce how much sugar is consumed, did NOT pack it down)
1/4 C heavy whipping cream (I've also  made it with Whole Milk)
little bit of salt
Dash of Vanilla

Add the butter, brown sugar, milk, and salt in a pan. Bring it to a boil over medium high heat. Whisk or stir the entire time for 5 minutes or so until it thickens. TURN THE BURNER OFF. Add the vanilla; it'll bubble a bit. Turn the heat back on and cook for another minute.

Refrigerate when done using. 


Assembly:
1) Lay a crepe down
2) Add some filling
3) Roll it
4) Repeat until your plate is full
5) Drizzle some filling over your crepe and a little easy caramel sauce


Viola!


BEFORE I added ANY caramel sauce to the kids' plates, they had to have a bit without. And since they asked for me to cut up their crepes, I did. My oldest is only 5.


IF/WHEN I make this again, I would change a little bit to the recipe and process. I'd cook the butternut squash a bit longer. While there were a couple bites of obvious just squash (based on texture and taste), the squash I picked really just added a buttery flavor to the dish. I did get ONE, "Mom, this apple tastes funny" comment from my eldest (and pickiest), but ALL four kids gobbled down their food without complaint. 

I'd cook the squash longer so that it's a bit more tender. I'd also add more blueberries than I did. Maybe 8 oz (which is about a cup); enough that there seems to be an even ratio of apples to squash to blueberries and back again. The bites of squash with blueberry was out of this world delicious. 

I'd also add more than 1/4 cup of maple. The 1/4 cup of maple came from JUST the Cinnamon Maple Butternut Squash recipe, and you need probably another 1/4 cup for the apple filling by itself. I think with these changes, I could eat this dish without the syrup and make it completely pale; if I ever master paleo crepes! I think I'll add walnuts or pecans next time to; just to give it a little crunch.

Needless to say, my kids ate up EVERY last bit on their plate and I thoroughly enjoyed my crepes as well. I'll just have to see how my husband takes to it and if I can reverse the damage done in his mind on eating squashes!


1.18.2013

I. Love. Food.

One of the very first places Joshua took me out on a date to was this little Italian restaurant in Monterey, California. I remember it as the first place he took me out to because our "first dates" were by my invitation. This little Italian restaurant, however, was something I had NOTHING to do with. It wasn't until years later (and years into our marriage) that I informed Joshua it was probably that little Italian restaurant that won me over.

"What do you mean?" he'd asked.
"The way to my heart apparently is through my stomach." :)

I simply LOVE food.

Now, there are some foods I will NOT eat because I have tried them and do not like nor care for them (ie. pickles, or anything pickled for that matter) And there are foods I will NOT try simply on personal principle (ie. liver and onions). I am not one to eat everything and anything because it is food. That stubborn little girl my parents raised still lives. However, I still think it is safe to say: I. Love. Food. I just don't think you can call me a foodie.


I didn't always like food though. Don't get me wrong, I ATE as a child. However, I was an INCREDIBLY picky eater growing up and preferred my meat and potatoes to anything else. Not that my parents didn't try to get vegetables into my diet, they did, I was just "particular". It wasn't until college that I deemed salads "good" or even "tasty". And I KNOW my parents will NEVER let me live down the carrots and the toilet incident.

(All I can say to that story is 1. I tried and 2. I would have succeeded if we had had a dog.)

Thankfully, times have changed and today I don't mind some of my vegetables. But only SOME. I still prefer my carrots raw and sliced in a salad, cooked in a soup, or mixed in with lettuce wraps. Cauliflower mashed potatoes aren't too bad and if I'm going to have a salad, there had better be some green onions, meat of SOME kind, and dressing on the side. Croutons really couldn't hurt either. The point though is I've learned to LIKE some of the foods I couldn't STAND eating and did what I could to get rid of them (even if I didn't check to make sure they'd flushed all the way; there now my parents don't have to tell you the story).

This is just my little space in a huge cyber world to share my recipes or discovery of recipes.